How to Adjust Preload for Sport Touring
It’s fair to say the most valuable suspension adjustment on virtually any motorcycle, and the easiest to make, is often the most overlooked. You might ask, what is that suspension adjustment? Well, in a word – preload. Preload is a simple adjustment that any rider, mechanically inclined or not, can make to tweak motorcycle handling and comfort all in one go. Let’s take a closer look.
Preload in Brief
Motorcycle suspensions are always under some kind of load, either the weight of the motorcycle alone (known as free sag), or that plus the weight of a rider (known as race sag or static ride height). On top of that, sport touring motorcycles often carry luggage and a second rider. All of this causes the suspension to compress. That compression is called static spring sag. It is the result of springs, working at a given spring rate, absorbing that weight (or force) while the motorcycle is at rest. The amount of spring sag is controlled by setting spring preload, or simply preload.
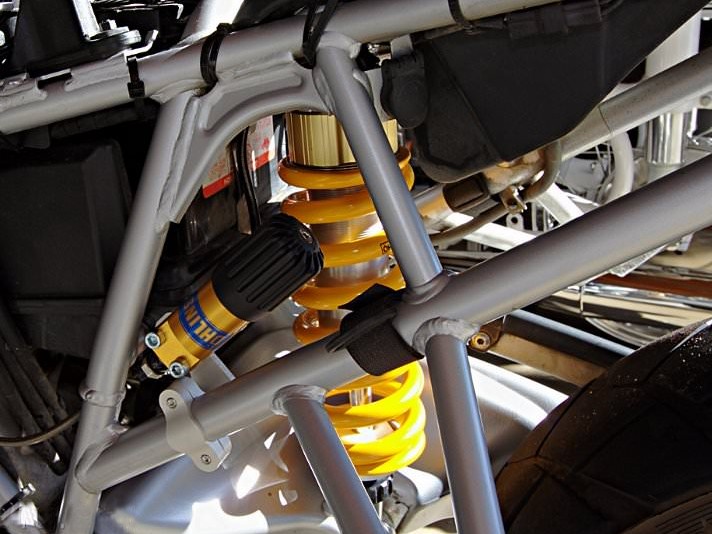
Increasing and reducing preload is done by turning the spring collar on the on the shock assembly up or down the clockwise or counterclockwise. Most preload adjusting collars are at the top of the spring. Turning the collar clockwise compresses the spring and increases preload, while turning counterclockwise reduces preload.
Note that the length of the shock absorber assembly, the distance between upper and lower mounting points, does not change. However, preload can affect static ride height by increasing or decreasing the force needed to push down the suspension. In other words, the same motorcycle and rider will not compress the suspension by the same amount after preload is increased, thus raising static ride height. We’re talking millimeters here, and the additional ride height is only evident when the bike is not weighted to match preload (i.e. only one rider but preload set for two).
Preload directly changes the amount of force required to initiate spring compression. The actual rate of change is a function of spring rate. Without getting into the nitty gritty details, consider this example. The force of a 10kg weight will cause a spring with a spring rate of .5kg/mm to compress 20mm; (10kg divided by the spring rate of .5kg/mm). Now assume that the preload is adjusted to compresses the spring 20mm within the shock assembly, in effect applying the force of a 10kg static weight to the spring. Finally, imagine that a 180 pound (82kg) fully geared up rider gets on the motorcycle. The rider’s weight will force the spring to compress. But because of preload, the spring starts to compress 20mm within its length and only 144mm rather than 164mm (the distance expected if the spring were not already under preload). Preload accounted for the force of the first 10kg of the rider’s weight, causing the suspension to work deeper in the spring’s range (where more weight is needed to continue compressing the spring), resulting in a stiffer suspension that can better handle the weight (force) of a fully loaded rider and luggage.
Keep in mind that spring rates vary from motorcycle to motorcycle, as does the available suspension travel and the factory-set preload position. Fortunately, we can calculate preload for different load conditions without knowing those details.
Why Preload Matters for Sport Touring
For most sport touring riders, the factory suspension setup, including any preload adjustment, is a workable combination yielding a comfortable ride and predictable handling. But that can change when luggage and a second rider pile on. Suddenly, sag is more appreciable. Steering geometry changes and available suspension travel is reduced. In addition, weight on the tires is no longer balanced, potentially making the frontend lighter and increasing the risk of what’s known as “head shake” and loss of control. In a nutshell, handling, performance, safety, and comfort are all off.
Think about this for a minute. A stock motorcycle suspension is tuned for a typical adult rider of average size. The rake and trail are configured for responsive steering and stability at speed. Those settings resulted in the handling qualities that you experienced during the test ride, and the very qualities that convinced you to buy the bike in the first place. But then you load up for a touring ride. The extra weight increases spring sag and changes the overall geometry of the bike and its suspension. Too much sag will cause your suspension to bottom out more easily and increases the risk of losing traction in a corner. Conversely, too little and your suspension is too stiff, yielding a rough ride and once again reduced grip on rough roads. This is why sport touring riders should take the time to adjust preload.
Notice we haven’t really talked about front suspension preload. This is because sport touring riders most often adjust preload in response to the added weight of a passenger and luggage on the rear of the motorcycle. The imbalance this causes on the front suspension is adequately (but not completely) compensated for by rear suspension preload.
How to Adjust Rear Suspension Preload
Adjusting rear suspension preload is a straightforward process requiring a few simple suspension measurements and a little math. If your bike has electronic suspension, setting preload is likely just a matter of selecting a setting from a list of menu options. Nonetheless, you might want to follow these steps to measure the actual amount of preload at each setting. The example further down illustrates this point.
First Measure Extended Suspension Length
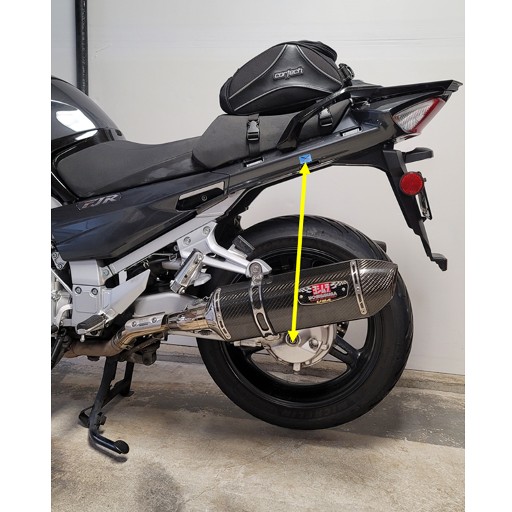
This first step is to measures the total suspension travel available on your motorcycle. That means the vertical distance from the rear wheel axle to the bottom edge of the seat (or a spot marked by a piece of tape) as measured while the weight of the motorcycle is not resting on the suspension. The easiest way to unload the suspension is to put the bike on its center stand. If you don’t have a center stand, ask a friend to lift the tail of the bike as far as it will go while you measure. Make a note of this measurement as Extended Suspension Length.
Next Measure Free Sag
Free sag is the amount the weight of the motorcycle itself compresses the suspension. This measurement is taken without a rider on board.
Balance the motorcycle on its wheels, without a rider on board. Press down on the tail of the bike to compress the suspension and then release it slowly. Now measure the vertical distance from the axle to the same spot that was used to measure the extended suspension length. Make a note of this measurement as Free Sag 1.
Lift the tail of the bike to fully extend the suspension and then slowly lower it back to its resting position. Repeat the same measurement from axle to marking spot. Note this as Free Sag 2.
Compute the average of Free Sag 1 and Free Sag 2. This is your Free Sag measurement.
We recommend using the average of two measurements to reduce the influence of static friction. All suspension parts are hampered by friction which can prevent rebound from reaching a natural resting point. Taking the average gets around this problem.
Now Measure Race Sag
Race sag, or static ride height, is the amount of suspension compression that occurs when a rider is on the bike. It’s important that the rider be fully geared up and sit on the bike in their customary riding position for these measurements. You want the weight for this measurement to as accurately as possible mirror a real riding scenario.
First move the motorcycle near a wall or post that can be used for balance. Then have the geared up rider get on the motorcycle and balance against the wall or post. Take two measurements following the same steps described earlier for measuring free sag. The averaged measurement that results here is called Race Sag.
Sport touring riders should repeat these Race Sag measurements for each combination of rider and luggage they anticipate. For example, measure Race Sag for rider only, rider and pillion, rider and rider luggage, rider and pillion and luggage for both.
Compute and Adjust Preload
The final step is to calculate sag length under each load scenario (e.g. rider only, rider and luggage, etc.). To do that, simply subtract Race Sag for each scenario from the Free Sag measurement.
With these lengths in hand, we can determine the amount of preload to apply following a rule of thumb that says Race Sag should measure between 25% and 30% of the total rear wheel suspension travel (the distance from fully extended to fully compressed). Add preload if Race Sag is greater than 30%, i.e. the suspension compresses too much, it’s too soft. Conversely, reduce preload if Race Sag is below 25%, meaning the suspension is not compressing enough, it’s too stiff. If you don’t know your total suspension travel, then a good rule of thumb is 25-35mm of sag.
Take fresh sag measurements after making adjustments to confirm the amount of preload is correct. Also, throughout the process keep track of where you start and how many clicks and in which direction you turn the shock assembly collar. Likewise, keep track of where you set the collar (in effect the preload) for each riding scenario so that you can easily reset the desired preload later.
An Example
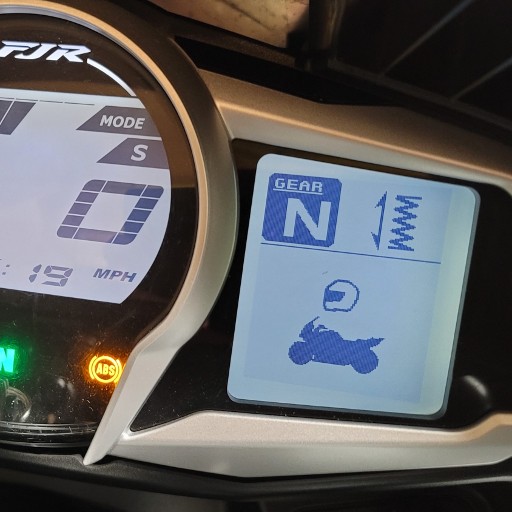
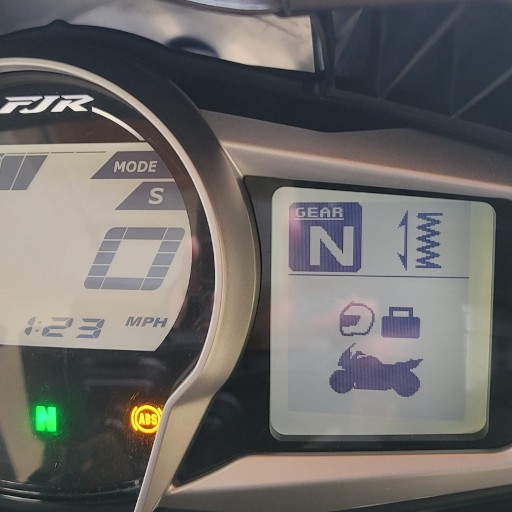
This example measures preload on a 2015 Yamaha FJR1300 with electronic suspension and no aftermarket suspension modifications under two scenarios. The first with rider only, no luggage; and the second with rider and luggage. If you occasionally ride two-up or with extra luggage, take additional measurements for those scenarios.
The ideal race sag for the FJR, whether one rider or two with or without luggage, is between 32mm and 39mm determined by applying the 25-30% rule of thumb to the 129mm of rear suspension travel.
Keep in mind that extended suspension length as used in this example measures the vertical distance between the axle nut and a marking point placed on the body work. It does not measure the FJR’s true rear suspension travel length. Nevertheless, it is a perfectly valid measurement for determining preload. If you want the spec rear suspension travel, ask your motorcycle manufacturer or use weights to fully compress the rear suspension and measure it yourself.
Also note that each sag measurement is derived from the average of two measurements, the first after raising and lowing the suspension, and the second after compressing and releasing the suspension. The average, as mentioned earlier, compensates for the effect of static friction inherent in suspension components.
Scenario 1: Rider Only; suspension preload set for rider only
| Measurement | Length (in mm) | Sag (in mm) |
|---|---|---|
| Extended suspension length | 480 | — |
| Free Sag | 460 | 20 |
| Race Sag 1: rider only | 437 | 43 |
Conclusion
The amount of race sag, or static ride height, measures above the rule of thumb range (32mm to 39mm). While pretty close, it suggests a little more preload might be needed. So, we set the electronic suspension to “rider and luggage” since there is no way to manually add preload. After re-measuring, race sag dropped to 42mm. We could add even more preload, and further reduce sag, by setting preload for two-up riding. Ultimately, the best setting is a matter of rider preference.
Scenario 2: Rider & Luggage; suspension preload set for rider and luggage
| Measurement | Length (in mm) | Sag (in mm) |
|---|---|---|
| Extended suspension length | 480 | — |
| Free Sag | 456.3 | 23.8 |
| Race Sag: rider and luggage | 431.3 | 48.8 |
Conclusion
The amount of race sag in this scenario is well above the rule of thumb (still 32mm to 39mm). To bring sag down into the ideal range, set the preload for two riders plus luggage. At some point you will, unfortunately, run out of available preload. When that happens, the only option is to install stiffer springs, or live with a softer ride.
Important Takeaways
Making preload adjustments prior to a long sport touring adventure ensures the suspension remains balanced under the extra weight of luggage and possibly that of a second rider. Even without extra weight, adjusting preload in response to road surface conditions can help the suspension work better and give you a smoother, safer, more performant ride. Spend an afternoon taking measurements with the various rider and luggage combinations you envision, and then keep them handy for quick adjustments before your next ride and in response to changing conditions while on the road.


Did we hit the mark?
Click the Thumbs Up or Thumbs Down button to email your feedback.
Your questions and comments help improve American Sport Touring. Your email is not used for any other purpose. Please read our Privacy Policy.